Create killer sounds with Logic Pro X's Retro Synth.
The classic hardware synth engines of the '80s and '90s have been combined in a clean and simple virtual design, with the introduction of Retro Synth in Logic Pro X. In this workshop, we'll examine a few library patches and instrument presets that show off its architecture, and tweak a few knobs that should inspire your own killer synth sounds.
Here's a pointer for getting comfortable quickly with the Retro Synth interface. The four tabs in the Oscillator area, top left, represent the four classic synth engines available. Each one opens to a view of an independent instrument with a distinctive colour scheme. You can almost think of Retro Synth as four synths in one. To simplify the learning curve, each of these synth engines uses the same modular, visual representation of their signal flow. Retro Synth's streamlined interface, with tabs for its four synth engines — Analog, Sync, Table and FM — in the top-left. The combined architecture is capable of creating retro, funky, futuristic and evolving sounds.
To immediately experience Retro Synth's sonic potential, try the 'Space Insects' patch found in the Library under Synthesizer / Soundscape. This patch layers three software instruments using Retro Synth, each one enhanced with MIDI plug-ins. Be sure to hold a note down for at least five seconds to hear the sound's full trajectory.
The Synth Engines
Here's a quick tour of the four synth engines, which are accessed in the Oscillator section, from left to right. We'll then look at each of them more closely.
Analog is for classic warm synth sounds, leads, brass, strings, pads and basses. Create a new software instrument and try the Retro Synth preset in the Synth Pads folder called 'Berlin Xperience' to get an idea of what it's capable of. The Analog synth engine. The Mix slider adjusts the blend between Oscillators 1 and 2.
Sync is for more aggressive synth sounds, especially leads and basses. There's a cool bass sound using this engine in Retro Synth's Synth Bass presets called 'Synced Metal Bass'. Quickly blend its timbre into your project by adjusting the Oscillator Mix slider in the Oscillator section.
Table, abbreviated from wavetable, can generate a wide range of sounds from natural, acoustic instrument sounds to synthy, evolving textures, pads and sound effects.
The last engine, FM, is for classic digital synth sounds such as bells, electric pianos and sharp bass sounds. In Retro Synth's presets, try 'Auto Focus' in the Warped Synth folder, 'FM Bells' in the Synth Keyboards presets, or the Synth Bass preset called 'Tube Acid Bass'.
Synth Layout
The beautiful thing about Retro Synth is that all four tabs reveal a similar layout of controls for each of the four synthesizer engines. From left to right in the top row, there's the Oscillator section, then the Filter, Amp and Effect sections. Glide/Autobend, LFO, Filter Envelope and Amp Envelope are found in the bottom half of the interface for each synth type. This uniformity of layout makes it easy to get acquainted with any of these types of synth, even if you're just selecting presets and making minor tweaks to blend them with your project. Let's take a quick look at each of these engines.
Analogue Synthesis
When using the Analog engine, there are two oscillators to generate the sound. For different sonic colours you can choose the different waveforms with the two Shape knobs. You can also alter the balance between the oscillators with the Mix slider. The waveforms are then processed by the other parts of the synth engine.
Navigate out of the Retro Synth presets to the root level of the patch library by clicking to the left of the Settings button at the top of the Inspector channel strip. You have to hover your cursor next to the Settings button to reveal the disclosure triangle. In the library category Synthesizer / Soundscape, select the patch 'Voyager'. This is a complex patch that uses the Analog synth engine. To quickly transform the sound try any of the following:
Sync Synthesis
In the Sync engine there are, again, two oscillators. They have a unique relationship in which the second oscillator is resync'ed with the first. This engine is conducive to creating aggressive sounds.
The Sync knob makes the sound more or less aggressive. Experiment with adjusting that knob as well as using the Sync Modulation knob to choose whether the LFO or Filter Envelope is the source of modulation. The Sync engine's Oscillator section.
Wavetable Synthesis
With Table — short for wavetable — the Shape knobs are, again, for choosing the type of waveform and basic tonal colour. The Synthesizer / Soundscape patches 'C-Beams Glittering', 'Parallel Universe' and 'Pulsating Driver' are beautiful examples of the sort of evolving textures and pads possible with this type of synthesis. In the Pad category of patches, 'Cosmos' has a nice evolving texture.
There are also 100 waveforms available, known as Digiwaves (which are also found in the ES2 synthesizer). As you rotate the Shape 1 or Shape 2 knob, or type in a numeric value, you change the waveform selection. An impressive example is in the Retro Synth presets' Warped Synth folder, called 'Transmissions'.
FM Synthesis
The interplay of oscillators with this type of synthesis is pretty interesting. There are different tuning ratios between the two oscillators. With FM, they are referred to as the 'modulator' and 'carrier' oscillators, and they determine the overtone structure. The modulator oscillator modulates the frequencies of the carrier oscillator, which is a basic sine wave, so inherently pure in tone. Experiment with the five sliders to adjust the tuning ratio and modulate the wave shapes for creative adjustment of the sound. From left to right, the FM slider adjusts the amount of the carrier waveform; the Harmonic/Inharmonic sliders adjust the tuning ratio between carrier and modulator oscillators to alter harmonic and inharmonic content and tone; the Shape slider modulates the carrier waveform in conjunction with the FM slider to further adjust harmonic content; and the Mix slider adjusts the level between the modulator and carrier oscillators. The Mix slider can offer the most instant gratification for useful tonal adjustment.
A good example of FM is the patch in Synthesizer / Experimental called 'Falling Razor'. For more dramatic musical effect, experiment with rotating the Modulation knob between the LFO (hard left) and Filter Envelope (hard right) to control the modulation source and intensity. This knob works in conjunction with the FM/Harmonic switch to its right, which you can use to set the LFO or Filter Envelope to modulate FM amount, FM amount and harmonic content, or just harmonic content. The Vibrato knob above offers the standard adjustment to the amount of pitch modulation.
When you're creating patches, it's worth remembering that all the sliders and knobs are interdependent and can quickly upset the balance of your sound. In FM mode, the relationship between the carrier and modulator oscillators can be tweaked here.
Amp & Effect Modules
For all four of Retro Synth's synth engines, there are a few other useful modules to be aware of.
The Amp section controls volume; mix a sine wave into the output stage here to thicken the sound or adjust the volume knob to tweak the overall output level. The Effect module offers classic synth effects, like Chorus and Flanger, from a pop-up menu. The Mix knob is straightforward. Use it to adjust the balance of the original and effected signal. The Rate knob adjusts the modulation speed of the selected effect.
Go to the modulation controls at the bottom. Experiment with Glide — also known as portamento — to slide from one note into the next. If you have some knowledge of synthesis, the LFOs and envelopes in Retro Synth will provide a familiar set of tools for designing your synth sounds. Also, adjust the filter cutoff and type (from the drop-down list in the Filter section) for endless sonic possibilities. Retro Synth's Glide, LFO/Vibrato and Envelope sections.
If you want to change the number of synth voices (maybe for a monosynth), click the Settings button in the bottom right of the interface. This gives you access to the number of voices used (up to 16), as well as other global controls like voice detune, stereo spread, doubling, transposition, tuning and bend range.
While there are tons of amazing Retro Synth presets and useful patches in the Library, give yourself just a little time to get comfortable tweaking these easy and fun controls. Any Retro Synth preset will quickly become a part of your own individual sound, making Logic more than ever your instrument.
Quick Tip
When switching patches in the Library, click the subcategory at the top, below the Search field, in this case called 'Synth Leads', to jump back to the root level.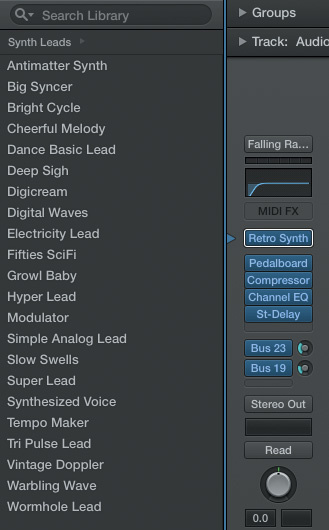
- Tweak the waveforms using Shape 1 and Shape 2 in the Oscillator section.
- Adjust the cutoff and resonance in the Filter section.
- Rotate the LFO knob in the Filter section.


